Dish Forty: Greenland


Dish 40. It’s the half-way point! Happy Days! Oh frabcious day! Calloo Callay!  I chortle in my joy. I thought I’d celebrate getting half-way through the project by choosing a country where I can organise a three-course meal and invite Mum and Dad round. After all, 40 dishes of this… this… thing is a big deal.  It deserves a celebration. I deserve the celebration and congratulations – I think anyway. But the reality was of course completely different.  Because it turned out that number 40 day coincided with the Big Church Picnic at my church. This is my church, Chichester Baptist Church. I don’t think I’m actually in the video linked, but it’s still my church.

And so we had this picnic,  both the evening and morning services together. It was meant to be at the college, but it was rather rainy, so we had it in the church, with all the chairs moved back, sitting on rugs on the church floor. There were tug of war bouts and various games in different rooms, so I didn’t actually see Daniel once he’d finished eating.  I can’t even say what he was doing, because I have no clue. Possibly massive Jenga, or bridge building, possibly watching older boys play pool. But why is this relevant to Dish 40: Greenland?  Well, I could hardly have a 3-course meal when I’d been picnicking at church all day. So I chose a country that’s been on the back-burner since September 2015, when I realised I was never going to manage three dishes every two weeks and never got round to doing the dish I had intended.  So Greenland it was.
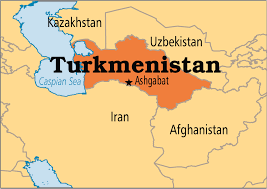
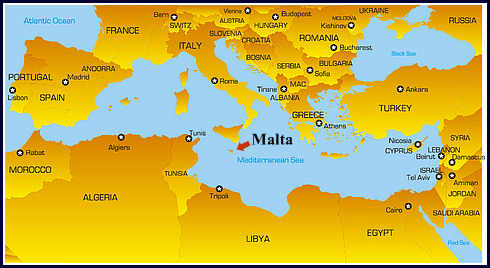
Map of Greenland

Map of Greenland

Greenland is a massive island between the Atlantic Ocean and the Arctic Ocean. It rarely gets dark in the summer and in the winter the aurora borealis gives a good show. It is not officially a country, as it is owned by Denmark, although actually it’s somewhat autonomous these days. Neither is it green, as it’s mostly covered by a large ice sheet.  In fact Greenland and Iceland should swap names really.  It’s clearly a ridiculous misnomer. Nuuk is the capital city and the language is Greenlandic. It’s the most sparsely populated country in the world, many of these inhabitants are Inuit. Father Christmas also lives there. Daniel used to think that if you walked down the street in Greenland you’d find igloos and “normal” brick houses next to each other, next door neighbours. I’m confident he’s wrong!

As I searched for Greenlandic food in September last year, I discovered quite quickly that most of their recipes were really not for me. Or most people in fact. Being an island,  there are lots of fishy recipes. But their other staple meats are whale, seal, reindeer and caribou. I might be able to buy reindeer meat from a specialist butcher somewhere,  but I’d rather not. Reindeer are cute, well Father Christmas’ reindeer that came to the school Christmas fete last year were anyway. And then there’s kiviat,  which is in a grossness league of its own. Wikipedia has this to say about kiviak:

“About 500 auks are packed into the seal skin intact, including beaks, feet and feathers. As much air as possible is removed from the seal skin before it is sewn up and sealed with seal fat, which repels flies. A large rock is then placed on top to keep the air content low. Over the course of seven months, the birds ferment, and are then eaten during the Greenlandic winter, particularly on birthdays and weddings.”

How grim can you get. You can also make it with guillemots quite successfully,  but not eider,  as it doesn’t ferment very well and causes botulism. Well, what do you expect?

Bearing all this in mind, it was a blessed relief to discover that they eat bread as well. In fact they have a rather nice sweetbreads,  with raisins and cardamom in it. Except that actually although I put cardamom in it,  now in searching for the recipe I used I can’t find one anywhere that has cardamom in the actual loaf, which is what I remember it being. Instead there’s cardamom mixed with icing sugar dusted on top, which mine didn’t have.  I’ve spent ages looking for the right recipe that I must have used, but now I’ve got to admit that I must have done it wrong. And looking at the website I’ve linked to below, it’s easy to understand how (although it’s now just as easy for me to see that it’s wrong!). Look, it says “add yeast to the other ingredients” and the bit about brushing the sugar and cardamom on the top is separated from the rest of the recipe by a picture. I reckon I therefore added all the ingredients at that point, rather than leave the cardamom and icing sugar to sprinkle over the top. So there we go, I did get it wrong. What a numpty.

But there we have it. You can try the recipe I thought was right but wasn’t or you can try the recipe as it should have been.

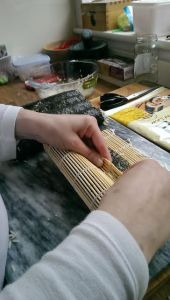
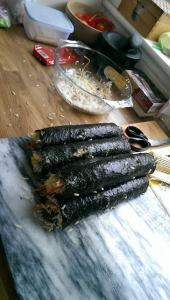
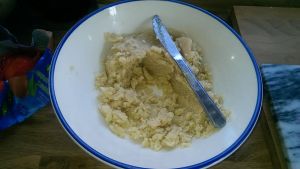
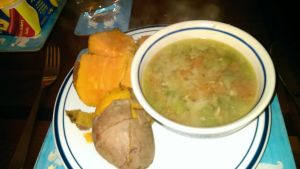
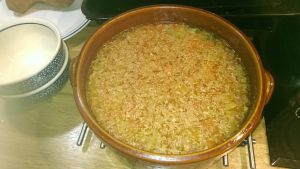
Kalaallit Kaagiat, then, is the name of this Greenlandic sweetbread. It was alright, I wouldn’t go so far as to say it was the tastiest food I’ve ever cooked, but given that it was the first time I’ve ever made bread (apart from the Latvian piragi), I don’t think I did badly. It looked a bit burnt on the crust, but hey there’s only a little bit of crust on each slice isn’t there. The bread itself was rather  though and I expect if I were a better baker I’d be able to do something about that,  or at least know what to do about it.

Slices of Kalaallit Kaagiat

Slices of Kalaallit Kaagiat

We took a few slices, covered in butter, to the Big Church Picnic. Our minister, Ken Ben, had his lunch with us on our rug, but although he shared our strawberries he turned down the opportunity for a slice of kalaallit kaagiat. We decided it would taste much nicer spread with strawberry jam and we were right. So I took a couple of slices lathered in strawberry jam to school for Mrs Budgen, my chief cake taster. She was a bit bemused as to why I was presenting her with a jam sandwich – she didn’t realise I’d made the bread, until I spelt it out to her. Yes, she honestly thought I’d randomly brought a jam sandwich in to school to feed teachers. What a vote of confidence in my mental state! Clearly that’s the sort of bizarre behaviour she has grown to expect from me. Anyway after explanation she understood the situation and devoured my offering happily enough.

As I said, it wasn’t the nicest loaf, it was ever so, ever so filling. We didn’t actually finish the loaf – it lasted so long we ended up chucking the end away.

Kalaallit Kaagiat 

Ingredients

Loaf of Kalaallit Kaagiat

Loaf of Kalaallit Kaagiat

1/2 cup sugar

1/2 cup raisins

1/2 cup butter

1 cup boiling water

2 1/4 teaspoons yeast

1/4 cup lukewarm water

3 – 3 3/4 cups plain flour

1 tbsp milk

1 tbsp icing sugar

1/4 tsp ground cardamom

Method

  1. Put the sugar, raisins and butter in a large bowl. Add some boiling water and leave it until the butter melts.
  2. In a small bowl, dissolve 1/4 tsp sugar in lukewarm water.
  3. Sprinkle yeast on top and leave 5-10 minutes until it becomes foamy. Well actually it says 5-10 minutes but actually it’s considerably longer than that. I think I gave up waiting when I saw the first bubble.
  4. Add the yeast to the other ingredients melting the butter and mix to combine.
  5. Add 2 cups of flour and mix until you have a rough dough.
  6. Add the rest of the flour, a little bit at a time, until the dough is soft and elastic.
  7. Knead well for 5 minutes and put it in a lightly greased bowl.
  8. Cover the bowl with clingfilm and a teatowel.
  9. Leave to rise for about an hour until it has doubled in size.
  10. Preheat the oven to 200C.
  11. Cover a baking tray with greaseproof paper and spread some butter on it. I didn’t do the butter bit and the paper stuck to the bottom of the loaf.  Had to peel it off each slice!
  12. Shape the dough into a loaf and place it on the baking tray.
  13. Cover with a towel and leave to rise for another 30 minutes.
  14. Brush the top with milk and bake for 30 minutes.
  15. Reduce the oven to 180C. Bake for another 15-30 minutes.
  16. In a small bowl, mix the icing sugar and the cardamom. Dust over the cake.

Spread butter and strawberry jam on each slice and enjoy.

Posted in Greenland, Uncategorized | Tagged , , | Leave a comment

Dish Thirty-Nine: South Korea

One of the recipe books that Sarah gave me for Christmas was from South Korea, so at first I thought that cooking South Korea was going to be easy – by which I mean finding a recipe, not the actual cooking! But I looked through the recipe book, and to be honest I didn’t particularly fancy any of them. Also, they are all quite spicy hot and although Dawn is good with food, she doesn’t like her spicy food to be too spicy. So I settled for Dak Galbi, spicy chicken with vegetables, which is spicy but hopefully not too bad!

Map of South Korea

Map of South Korea

South Korea is in south-east Asia, but more oriental than Thailand, Malaysia and other south-east Asian countries, and is just across the water from Japan. It borders North Korea, the two countries making up the Korean peninsula.The capital city is Seoul, where the Olympics were in 1988, the first Olympic Games that I was aware of. I really should have been aware of the 1984 Olympics as well, but I was rather too away with the fairies to even notice that the rest of the world existed, let alone that such a thing as the Olympics was going on!

Look up South Korean food on the internet and you’ll discover that there is very little distinction in the big wide world between North Korean and South Korean food. Is this because it is actually the same? It wouldn’t be a surprise, as they are so closely linked geographically and historically. Or is it because North Korea is such a closed country to the rest of the world? I think it’s probably a mixture of the two. Either way, I’m glad Dawn didn’t choose North Korea as one of the countries on the list.

So, dak galbi. The problem with this was that there was a lot of specialised ingredients that I needed to source for this, namely gochujang (Korean hot bean paste) and gochugaru (Korean chilli powder). I searched and searched. I found a South Korean meal kit that contained one of them that I was looking for, but the other was still outstanding. I went to Sainsburys and found something that was similar, but it wasn’t really the same thing. As you know, due to my lack of innate cooking skills, I really need to follow the recipe tot he letter, and the idea of using something that was a close approximation to what I was looking for really wasn’t hitting the spot for me. It made me anxious that what I ended up producing would not be the dish that I was meant to be making. So do you know what, I didn’t make it. We didn’t do an 80 dishes that week and my Sunday was all the calmer for it.

South Korea was postponed for the week, and I had a week to decide what I actually wanted to cook, by surfing the internet, and then several days sourcing the stuff. What I eventually found was gimbap. Gimbap is Korean sushi. The difference between Japanese sushi and Korean sushi is that Korean sushi is not made with raw fish, but cooked meat. For me, that is marvellous as I am really not into either raw food or fish. A less exciting prospect was the idea of seaweed. Gimbap and sushi both have seaweed, and I wasn’t sure that I liked seaweed. I mean, I don’t think I’d actually eaten it before, but seaweed? The very thought is frankly repugnant. But I bit the bullet and did what I was told.

I work in Portsmouth, and at the top of Commercial Road is an oriental shop which sells all sorts of oriental gubbins, mostly food, but other stuff as well. And off I trundled one lunch time to get my ingredients. Most importantly I thought was the pickled yellow radish, or danmuji, because I’ve never heard of that and presumed I would not get any in Tesco (I presumed right, by the way). At the shop, there was a choice of different looking danmuji – there was some that was sliced across, some that were sliced lengthways and some that were whole danmuji. I went for the sliced across danmuji, as it was closer tot he amount I needed. But when I got home I realised that actually I needed is sliced lengthways. So the next day I went back to the shop and bought some more – not the sliced lengthways stuff, because it was a very large amount, but a whole danmuji. Even now, months later, I’ve still got the sliced across danmuji in my fridge.

From the shop I also bought the sheets of seaweed I needed (there were several versions of this as well, but I had no way of telling which was the best one, because I couldn’t read the script it was written in, so I just chose whichever one I felt like), some spinach that was in a bunch and looked just like the photo on the webpage, and one of the most important things in the making of this dish, a little roll-up bamboo mat produced especially to make gimbap and sushi.

Onto the cooking, and I was really impressed with myself for this meal. It was unlike anything I’ve ever cooked or eaten before. I’ve never had seaweed, as I’ve mentioned already, and my preconception was right – it tastes as vile as I thought it would, but Dawn loves it. She’d quite happily eat it for breakfast, lunch and tea I think.

Dawn has a go

Dawn has a go

Gimbap has a whole bunch of ingredients, which you prepare first (obviously, you can’t prepare last of all can you!), including the meat being marinated and cooked. You lay the seaweed out on your little bamboo mat (it’s the seaweed that is the “gim” by the way), almost cover it in cooked rice and then lay strips of your ingredients out over the middle of it. The next bit is really tricky, and I wasn’t very good at it. You have to roll it up, making it really tight. You also have to make sure that the bamboo mat doesn’t carry on rolling up after you want it to, and roll it out instead, but at the same time keep the gimbap from falling apart. I wasn’t entirely successful. Dawn helped me out for one of them, and took some photos of me doing one, as an illustration, but actually the one that she photographed me making was the only one that irretrievably fell apart and I had to start again.

Left overs

Leftovers

The final bit, the final bit, when you think, phew! it’s over was not easy either. The gimbap is made and it’s a big, long, black, rice and ingredients filled, seaweed sausage, which needs chopping up into slices. This provides just another opportunity for it to all fall apart. Which quite a lot of it did. Which was the reason why I had quite a lot of leftovers. I actually enjoyed the leftovers more than the actual gimbap because there was no seaweed involved. There was so much of it though, that sadly I ended up wasting most of it and feeding the bin.

All in all though, the gimbap was a success. It took me a long time, and I’d only just finished it when friends came round to play. So Chris was the first one to taste it and he enjoyed it. Dawn loved it, I thought they were ok but preferred less seaweed. I was seriously impressed with myself for making it though, because it really was out of my comfort zone. I expect Dawn would want me to make it again, but I’m grounded in reality here, and I’m confident that that won’t happen any time soon.

Ingredients

Chopped up gimbap

Gimbap

5 sheets of gim seaweed

4 cups of rice

1/2 lb beef steak

1 carrot

5 strips of yellow pickled radish, danmuji

1 small bunch of spinach

3 eggs

3 garlic cloves

2 teaspoons soy sauce

1 tbsp plus 1 tsp brown sugar

1 1/2 teaspoons salt

2 1/2 tbsp oil

Method

  1. Cook the rice. Put it in a shallow bowl.
  2. Mix in 1/2 tsp of salt and 2 tsp of oil with a wooden spoon. Leave it to cool until it’s no longer steaming. Put a lid on it and put it aside.
  3. Blanch the spinach.That means put it in boiling water for a bit. Then rinse it with cold water and strain it.
  4. Mix the spinach, two minced garlic cloves, 1/2 tsp salt and 2 tsp oil in a bowl.
  5. Mix well by hand and then lay it out on a plate.
  6. Slice the danmuji lengthways and lay it out on the same plate
  7. Cut the carrot into 1 inch matchsticks and mix 1/4 tsp salt into it.
  8. Let the carrot sweat for 5-10 minutes.
  9. Heat a pan and put oil in it. Squeeze out the water and then saute it for about 1 minute. Then put it out on the plate with the spinach and danmuji.
  10. Slice the steak into 1/4 inch wide, 3-5 inch strips.

    Gimbap filling

    Gimbap filling

  11. Put the strips into a bowl. Add 2 tsp soy sauce, 1 minced garlic clove, 1/4 tsp ground black pepper, 1 tbsp + 1 tsp brown sugar, and 2 tsp oil.
  12. Mix well by hand.
  13. Set aside, so that they can marinate.
  14. Crack 3 eggs in a bowl and add 1/4 tsp salt.
  15. Beat it with a fork and take away the gross stringy bit.
  16. Drizzle a few drops of oil on a heated pan. Wipe off the excess with a paper towel so only a thin layer of oil is left.
  17. Turn down the heat and pour the egg mixture in. Spread it into a large circle so it fills the pan.
  18. When the bottom of the egg is cooked, flip it over with a spatula.This is not actually easy, but it looks a laugh at least.
  19. Remove from the heat and let it carry on cooking for about 5 minutes. Try to keep the egg yellow, not letting it turn brown.
  20. Cut the egg into 1/2 inch wide strips. Put it on the plate with the spinach.
  21. Finish the steaks, by heating up a pan over medium high heat and cooking the marinated beef, stirring it with a wooden spoon until it’s well cooked. Put it on the plate with the rest of the ingredients. Set aside.
  22. Place a sheet of gim on a bamboo mat with the shiny side down – I’m pretty sure my gim was shiny on both sides though.
  23. Evenly spread about 3/4 cup of cooked rice over top of it, leaving about 2 inches uncovered on one end of the gim.
  24. Put some beef, some carrot, a danmuji strip, a few egg strips, and a bit of spinach in the middle of the rice.

    Before rolling the gimbap

    Before the rolling

  25. Use both hands to roll the mat, the gim and the rice over the innards, so that one edge of the rice and gim reaches the other edge. This gets the filling in the middle of the roll.
  26. Press the mat tightly with both hands as you roll the gimbap. Push out the mat as you roll, so it doesn’t get wrapped in the gimbap, like I said earlier on.
  27. Remove the roll from the mat and put the finished roll on a plate with the seam down.
Rolling up gimbap

Rolling up the gimbap

Gimbap rolls

Pre-cut gimbap

  1. Make another one and then another one and then another one until you’ve run out of ingredients.
  2. Put some oil on the finished rolls and sprinkle some sesame seeds over top. Do you know what, I’ve only just noticed this bit, and did not do it.
  3. Cut each roll into bite size pieces with a sharp knife, occasionally wiping the knife with a wet paper towel to clean it and help with the cutting.
  4. Collect all the bits that fell out or fell apart and put it in a bowl and eat later.
  5. Eat the gimbap rolls.
Posted in Gimbap, International dishes, International recipes, South Korea, Uncategorized | Tagged , , | Leave a comment

Dish Thirty-Eight: Israel

The thing about cooking a dish from Israel is that you don’t just have a country’s culinary history to consider, there’s a whole creed’s culinary history. So do you look up on Google “recipes from Israel” or “Jewish recipes”. Well, I’m not sure it particularly matters, the outcome is very similar.

Israel

Israel

Israel is a country in the middle East. The capital city is Jerusalem. The main religion is Judaism, whilst about 16% are Muslim. Israel is the biblical Holy Land, for all the Abrahamic religions (that is Christianity, Islam and Judaism, as they all share a common Old Testament history). Hebrew and Arabic are the official languages and the shekel is the currency. It has borders with the Mediterranean Sea, Lebanon, Syria, Jordan and Egypt. It has been a war-torn area regularly for a considerable time, and we know how much the Jews have suffered at the hands of other races throughout history.

So, what do I cook? A well-known Jewish meal perhaps, a food used in Jewish celebrations? Well, I enjoy watching The Big Bang Theory on television every night at about 11pm and because of it I know that brisket is a popular Jewish food. So I looked that up online, but the main ingredient for the recipes was “brisket”, which is not helpful! Just having a brief look on the internet, you’ll see that there are many traditional Jewish foods, eaten at particular celebrations – and there are plenty of celebrations to choose from, the most well-known for the non-Jew being Hannukah and Passover. There’s challah – Jewish bread for the Sabbath, made round or plaited; kreplach  which are meat dumplings and eaten during Purim; kugel – I’m not sure what that is still; falafel, which is, well, falafel.

However, I decided that hamantaschen looked good. They’re a biscuity-type thing, but I didn’t want to make a biscuity-type thing, I wanted to do something for lunch. Lunch, because we were going out in  the afternoon. I can’t for the life of me remember what we were doing, but I think it was a party or a match or something. My diary isn’t helping and I’ve not mentioned anything on Facebook. I don’t know what it was, but I do remember that I was in a bit of a rush.

Anyway, so I didn’t want to just make biscuity things, I wanted to make lunch. And then I found this beauty: shakshuka. Eaten for breakfast, lunch or dinner, it’s a very popular dish. I have a friend via a Facebook group whose 8-year-old son, Toby Little, is becoming a bit famous. He had a book published around Easter called “Dear World, How Are You?” – a collection of letters he has received from around the world as part of his thus-far 3-year project to write to every country in the world. He quite likes to ask people about recipes, and when I mentioned Israel on the forum, his mum said that their Israeli contact recommended shakshuka and gave me this link. this link I’d already found, so I was delighted that this might actually be an authentic recipe.

Shakshuka in the pan

Shakshuka in the pan

What I like about pages like toris-kitchen is that there are lots of photographs recording what it should look like, at every step of the way. I don’t do that because the whole experience is stressful enough without pausing to take a photograph at all the crucial (potentially burn-inducing) moments. But it is really useful. This dish was simple to make, it really did take me 30 minutes as suggested on the website, and most impressively for me the end product looked like the picture on the website. So exciting, as that doesn’t often happen. Usually mine looks completely different and I wonder if it tastes different as well. But with step-by-step instructions and photos, I couldn’t go too wrong, and if the end result looks the same, surely it tastes the same. And I have to say it was delicious. It is tomato based and has egg in it, so definitely vomit-inducing for Neil, and I had to use tinned tomatoes which is one of my all-time vilest foods, but I was very pleased with the result, as I was Dawn. A lovely dish which I highly recommend.

As far hamantaschen, we made them too. Hamantaschen are eaten to celebrate Purim. Do you know what Purim is celebrated for? Well, King Xerxes fell out with his wife Queen Vashti, and looked round the whole country looking for a new wife. He took Esther, the cousin and adopted daughter of Mordecai. Mordecai heard two eunuchs plotting the king’s death and dobbed them in, so was in the king’s good books.

Haman was a court official of some sort, I remember not what sort, and Mordecai, a good Jewish man, refused to bow down to Haman as he walked past, and so Haman told the king that he would pay rather a large sum of money into the king’s coffers if the Jews were all bumped off. So the king set a date for the Jews to be obliterated, not knowing his wife Esther was a Jew.

After a national fasting of three days, Esther used her position as queen to gain an audience with the king and Haman a couple of times, which took guts as you weren’t meant to request an audience – you were meant to be asked, and she invited them to dinner twice.  After the first meal, Haman erected a gallows in his back garden to execute Mordecai, but the king spent a sleepless night and the next morning ordered that the court record be read out and realised that Mordecai was never rewarded for saving the king’s life, and he organised to honour him.

During the second meal, the king asked Esther what was wrong, and she told him how Haman plotted to kill her whole race and explained to the king that she was a Jew. The king as a result set up a crazy rule which involved many of his own people getting killed by the Jews as they were given permission to fight for their lives on the chosen day of reckoning (as he could not go back on his new law), and Haman was executed on his own gallows.

And it this whole episode that Purim celebrates. Hamantaschen is therefore named after this man Haman. I’ve read somewhere that they are triangular in shape to remember Haman’s triangular hat (and Daniel’s toddler Bible did depict him with a stupid-looking hat, so that proves it), but the website I found this recipe suggests that the three hats of the triangular biscuit represent Abraham, Isaac and Jacob.

The recipe I found suggested a traditional filling of poppy seed, prune or apricot jam. I decided to go for the poppy seed as it is the traditional way. This dish too was successful. I made a fair few of them, took one into school for Mrs B, as we have taste each other’s cake arrangement, and spent the week getting poppy seed stuck between my teeth. The triangle is just a pastry really, so it was the poppy seeds and honey that made it tasty.

In conclusion then, Israel was a success. Hamantaschen were nice, but they’re not really the sort of cake I’d make for fun, so it’s unlikely I’ll make them again just for the hell of it. Shakshuka though will be made again. I’ve even bought some tinned tomatoes for the larder in case I fancy it in the future. Talking of the tinned tomatoes, I’ve just remembered that the website recommended two cans, but as it was just Dawn and me I halved the amount and only had the one tin.

Shakshuka

Portion of shakshuka

Portion of shakshuka 

Ingredients

1 tbsp olive oil

1/2 medium onion, peeled and diced

1 garlic clove, minced

1 medium green or red pepper, chopped

2 cans diced tomatoes

2 tbsp tomato puree

1 tsp mild chilli powder 

1 tsp cumin

1 tsp paprika

Pinch of cayenne pepper 

Pinch of sugar 

Salt and pepper to taste

Eggs, 1-2 per person

1/2 tbsp fresh chopped parsley, to garnish

Method

  1. Heat oil in a large pan. Add the chopped onion and saute until it is soft. Add the garlic and fry a bit more.
  2. Add the red pepper and fry for 5-7 minutes until the pepper is soft.
  3. Add tomatoes and tomato puree to the pan, and stir until it is all blended together.
  4. Add the spices and sugar, and stir well.
  5. Simmer the mixture over medium heat for 5-7 minutes.
  6. Add the salt and pepper to taste.
  7. Break the eggs, one at a time, over the tomato mixture. Space them evenly over the sauce, so that they don’t splurge into one.
  8. Cover the pan. Simmer for 10-15 minutes, or until the eggs are cooked and the sauce has slightly reduced in volume If it reduces too much, it will burn, so don’t leave it too long.
  9. Sprinkle some fresh parsley over the top and eat it.


Hamantaschen

Hamantaschen

Hamantaschen

Ingredients

2 eggs

3/4 cup sugar

Pinch of salt

3/4 cup of butter

2 1/2 cups of flour

1 tsp baking powder

2 cups poppy seeds

1 cup water

1/2 cup honey

1/4 cup of sugar

Method

1. Mix the flour and baking powder.

2. In a different bowl, add eggs (already beaten), sugar and salt. Beat together until it looks light and the sugar has dissolved.

3. Add the butter and carry on beating until it’s all mixed in.

4. Slowly add the flour mixture, beating until it all comes together.

5. On a lightly floured surface, knead the dough a couple of times, before flattening it into a disc.

6. Wrap the disc with cling film and put it in the fridge for 2 hours.

7. Put the poppy seeds, water, honey, 1/4 cup sugar and a bit of salt in a saucepan.

8. Bring the mixture to the boil and reduce heat. Stir often to prevent burning, and carry on until it is thickened.

9. Heat the oven to 180C. Remove the dough from the fridge and roll out to 1/4 inch thick.

10. Use a round cutter or glass to make 3″ circles.

11. Put a tablespoon of filling in the middle of each circle.

12. Bend up three sides of the dough to make a triangle, and pinch the corners together.

13. Grease a baking sheet and place the hamantaschen on it. Bake for 12-15 minutes.

14. Wait for them to cool a bit ebfore you eat them, becuase the poppy seed mixture is hot.


Posted in Uncategorized | Leave a comment

Dish Thirty-Seven: Turkmenistan

Turkmenistan is about the fourth former Soviet Union country I’ve done, the others being Ukraine, Latvia and Kazakhstan. Oh yes, and I’ve done Russia as well of course, haven’t I ?! But when I do my favourite countries of the world quiz (196 countries in 12 minutes, although I think it’s been increased to 15 now, whilst my best time is about 7 1/2 minutes), I bunch Turkmenistan, Kazakhstan, Uzbekistan, Tajikistan and Kyrgystan into a block and so in my head they are all really close and very similar. Of course, although they are all in the same general area (very general – they’re almost the same size together as most of Europe) they are very different, and although I was expecting the food to be similar to Kazakhstan, it really wasn’t. Mind you, when I was looking for recipes online, one of the themes in common with each former Soviet Union country was filled dumplings – Mongolia too actually. I didn’t really fancy the look of any of them to be honest  – too greasy. Latvian piragi was the closest I was going to get, and that was filled bread really, wasn’t it, not dumplings.

Map of Turkmenistan

Map of Turkmenistan

Turkmenistan is, as I say, a former Soviet Union country. The capital city is Ashgabat, the official language is Turkmen and the currency is the Turkmen manat. It has borders with Uzbekistan, Kazakhstan, Iran, Afghanistan and the Caspian Sea, if you can call that a border. Have I ever mentioned that Auntie Sarah saw the 80 dishes idea and decided to join in as well? She, her two daughters Hannah and Alice, and the young lass who lives with them, Thida, all cook together and they feed their massive household. A few weeks ago they did Turkmenistan, but the map they use called Turkmenistan Turkmenia. As far as I can tell though, it’s never actually been called that though, so I don’t know where that’s come from.

They did not choose the same recipe as me – sometimes they do, most of the time they don’t. Sometimes they choose completely different countries, ones that aren’t on our list. Given there are 196 countries in the world and only 80 in the game, this isn’t entirely surprising. The meal that I chose this time round was Turkmen pilaf, – pilav,pilau, plov: it’s all got the same word origin and is simply a rice dish, plain and simple. Well, it’s not actually plain rice, that would be a grim dish, but it was simple to make. Sarah made Etli Çörek and Batyrma, which is meat in bread with Turkmen ratatouille. My choice sounds easier.

Turkmen pilaf, or palaw, was quite easy to make, and really tasty to eat. I learnt a new technique when cooking this dish, which is always fun, isn’t it. Not always, no, actually, but this time it wasn’t too bad. The recipe demanded julienned carrots. I didn’t know what that meant really – I’ve seen the word plenty of times of course, but it’s just been one of those words you see and accept but not really know the precise meaning. So I looked it up on Google and learnt that what it means is cut into short thin strips, about matchstick size. It takes a while, but it’s easy enough.

You may notice from the recipe that the recipe requires a large volume of ingredients – 5 carrots, 1kg of meat. Well I’ve learnt the hard way over the past months that that really isn’t necessary, especially when you’re only cooking for two. So I halved the main ingredients – 2 carrots only, and half the amount of meat, or rather 400g of beef, as that’s the amount it’s sold in.

I’ve just remembered a really important part of my experience of cooking this dish. This dish is brought to you courtesy of our neighbours across the road. A lovely couple, a bit older than my parents, who put our bins out when we’re on holiday and are very friendly. Which is lucky, because as I was cooking this dish, I suddenly realised I had run out of a vital ingredient: rice. Big oops. I ran over to them and dingdonged on the doorbell and they rescued me, giving me about half a packet of rice from their cupboard. She was really chuffed that I felt able to ask, and I felt very relieved that I could ask! So, the moral of this story is: don’t spend so much time worrying about the details that you forget about the most important bit. Julienned carrots are all well and good, but rice is a pretty major part of a pilaf dish. What a donkey! 

This really was a simple dish to make, but it was delicious. Furthermore, there was enough leftovers for me to have for my lunch during the week. If your rice is drying out when you reheat it, just sprinkle on a little bit of water before you pop it into the microwave and it will be fine. That’s what I’ve learnt recently – I can’t remember which dish I learn it for, but I did.

By the way, the picture below isn’t a particularly good one. I accidentally recorded it as a video instead of taking a photo, like a twit, and so this photo is a still grabbed from the vid.

Turkmen palaw

Turkmen palaw

Palaw

Ingredients

400g beef
1 tbsp salt
oil
1 large onion, halved and sliced
2 large carrots, julienned
700 ml water
500g rice, preferably basmati

Method

1. Cut the meat into small chunks. Add salt and mix well.

2. Heat the oil in a large pan over medium heat. Add the meat and fry until lightly browned.

3. Add the onion. When the onion is soft, add the carrots and fry for 5 minutes.

4. Add the water and the rest of the salt, and increase the heat. Boil for 5 minutes.

5. Add the rice to the pan and stir with a slotty spoon.

6. After a few minutes, lower the heat to medium and put a lid on the pan.

7. Leave to simmer for 30 minutes, stirring once.

8. That’s the whole dish done. Eat the food.


Posted in International dishes, International recipes, Turkmenistan, Uncategorized | Tagged , , | Leave a comment

Dish Thirty-Six: Malaysia

I’m learning more about myself during this 80 dishes adventure. What am I learning? I’m learning that actually I can cook, if I want to and have the time, that actually cooking isn’t hard in the main, that I’m a stickler for rules and must follow the instructions at all time, that I’m persistent – did I really expect to still be doing this a year later? No, but also yes, because I don’t generally give up something once I’ve started, and so to have stopped would have been unlike me. I’m much more persistent with the cooking than I am the blog-writing I must say – it reminds me of when I was a teenager, writing my diary. I’d be weeks behind and still doggedly write my diary entries for the fortnight previously. Deathly dull they were too: “Today, I had English, Latin, Maths, Science, French, Games and a piano lesson”. Hopefully, I’m doing a bit better with the blog!

Map of Malaysia

Map of Malaysia

Malaysia is in South-east Asia. There are two parts to Malaysia – the western part is on the mainland with borders with Thailand and Singapore. The eastern part is on the island of Borneo (the only place where orangutans live in the wild, as far as I’m aware), and therefore borders Indonesia. The capital city is Kuala Lumpur and the currency is the Ringgit. It used to be part of the British Empire, and there are still signs of this – the legal system for example is based on English common law. As I’m a lawyer, I find this a bit interesting, but as I’m not a die-hard “I love law, me” lawyer, I really can’t build up more enthusiasm for this bit of information than that – it remains only “a bit” interesting.

One more thing I’ve learnt about myself is that I rather like Asian  cooking. I’ve always liked Indian cooking – Mum’s fault that one, but south-east Asian is particularly good. Thai cooking has tickled my fancy, I’m confident Vietnamese food would have been gorgeous if I hadn’t blooming well nearly poisoned myself, and so I was not surprised to discover that Malaysian food was also a great highlight.

The Malaysian recipe was found in one of those recipe books that Auntie Sarah gave me for Christmas (or was it my birthday? Me and my sisters aren’t very hot on giving each other presents at the right time of year – one day Rebecca will  get her birthday present from last year, maybe even this year, Sarah too). The recipes in the book look so lovely. I’m not so sure about the dry squid curry – the very thought of it makes me want to throw up. Dawn would have liked it though – she went to a friend’s house recently and had calamari and thought it was brilliant. Bleurgh. I’ve never eaten it, you understand, I just can’t bring myself to try it. And I thought swordfish curry would probably be a little tricky or expensive to source. So I plumped with what has matured into being one of my favourite ingredients as I’ve already mentioned in Japan – ginger.

Women's Weekly Malaysian Favourites

Women’s Weekly Malaysian Favourites

The recipe I chose, beef stir-fry with ginger and green onion, required a 10cm chunk of ginger, sliced, not into tiny strips, but just thinly sliced. The picture in the book (which by the way is “Malaysian Favourites” published by the Australian Women’s Weekly) shows large circular slices of ginger. Lovely, I can manage that. It was a bit much for Dawn’s palate, but for mine, it couldn’t be better. I wasn’t sure what green onion was, but a quick look at the picture made it quite obvious that it meant spring onions. I could manage that as well.

I was a little nervous of the oyster sauce – after the Vietnamese fish sauce debacle, and the fact I was using a book from the same series, I was cautious about using something similar in case the same thing happened again. But I noted that the ingredients didn’t ask for nearly the whole bottle in one meal, and so I was brave and got on with it.

The meal required some marinading, which wasn’t too tricky – the beef (cut as thinly as I could manage – I bought some thin cut steaks and cut them into strips) was marinated in a garlicy mixture and the ginger was marinated in salt. That’s probably not called marinating is it, but it seems like marinating to me.

What it should look like

What it should look like!

The meal was not tricky to make and it was absolutely gorgeous. I really loved it and I highly recommend it. The picture in the recipe book had a nice wholesome red meaty colour, but as you can see from the picture below, mine came out somewhat more grey. I don’t care – looks aren’t everything. It was amazing, and I will make it again without a doubt. I’d also quite like to do some different Malaysian food, but that’s outside the remit of the 80 dishes project. Of course there are 6 other days in the week though, so it doesn’t mean I have to wait until this time next year when I’ve finally finished. My subliminal advice then is, make this dish.


Beef Stir-Fry with Ginger and Green Onion

Beef Stir-Fry with Ginger and Spring Onions

Beef Stir-Fry with Ginger and Green Onions

Ingredients

1 clove of garlic, crushed

1 tbsp cornflour

1/2 tsp bicarbonate of soda

1 egg white

500g beef, thinly sliced

10cm (or 50g) piece of fresh ginger, thinly sliced

cooking salt

10 spring onions

50g ghee

1/4 cup (60ml) water

1 tbsp oyster sauce


Method

1. Mix the crushed garlic, cornflour, bicarb, and egg white in a bowl.

2. Add the beef and mix well, so that the beef is covered with the marinade.

3. Cover the bowl, put in the fridge for 30 minutes.

4. Mix the ginger and some salt in a small bowl, cover and leave it to stand (not in the fridge).

5. After 20 minutes, rinse the ginger under some water, and pat it dry with kitchen towel.

6. Cut the spring onion into 5cm lengths. Heat the ghee in a wok, large saucepan thing, and the onion and the ginger and cook on high heat for a minute.

7. Take it all out of the frying pan and put it on a plate on the side.

8. Using the same frying pan, add the beef mixture and the water and cook it over high heat, stirring it until the beef is tender (that is, properly cooked).

9. Add the onion, ginger and oyster sauce.

10. Cook it by stirring it about until it is heated through.

11. Serve with rice.


Posted in International dishes, International recipes, Malaysia, Malaysian cooking, Uncategorized | Tagged , , | Leave a comment

Dish Thirty-Five: Belize

I was quite excited about doing Belize. I imagined exotic, brightly coloured food, sort of reminiscent to the Jamaican flag if you know what I mean. So I started my search buoyed by the idea that the meal this week could be exciting. But to be honest, it didn’t really turn out to be true.

Map of Belize

Map of Belize

Belize is a country in central America, with a shore on the Caribbean (which is why Jamaican flags came to mind), and jungle. Off the coast lies the second largest barrier reef The capital city is Belmopan. It’s only got about 368,000 people living in it, which is the 30,000 people less than Leicester, but Belize is 22,966 km squared while Leicester is 73 km squared. Sounds lovely. The Mayans used to live in Belize. Dawn like the Mayans. She has quite a convoluted game involving Mayans in which she is Zama, which means the East, Dawn, that sort of thing, in Mayan. Zama is a peasant girl who has an unlikely friendship with a boy from a higher social status, who she shows round her village, which was also called Zama as it faces east over the coast. Zama is a real place called Tulum, which is actually in Mexico, but was Mayan as well. Now you know.

Belizean cuisine is different to many other countries, as it only has a small amount of dishes which are used repeatedly. These include conch fritters, which funnily enough I was never going to be able to find the ingredients for. Conches remain firmly in the fiction compartment of my bookcase – wasn’t it a conch shell in the Lord of the Flies? That’s about my only experience of conches. It certainly isn’t eating them. Another traditional food is Fu-fu, which is mashed plantains. I expect I could find plantains, in fact since making this dish I know that I would be able to find some at the Mediterranean food shop in Southsea. But look, it’s called Fu-fu. How can I make fu-fu with a straight face; and I’m meant to be serving this food to my daughter. Here Dawn, have some of my lovely fu-fu. No, it just wouldn’t work.

There are however two traditional dishes that I would be willing to try: rice and beans, and stew chicken, which is what I did. Rice and beans is not to be confused with the other traditional dish – beans and rice. But that’s just semantics you say? Well, you’d think so, wouldn’t you. But apparently they are very different: rice and beans are cooked together, whereas beans and rice are cooked separately and mixed together at the end, which, I’m told, produces a very different taste. Well, I hope it does anyway, because actually rice and beans wasn’t altogether pleasant.

The greatest problem I had with rice and beans was the sheer amount of beans in it. When it talks of beans, it means kidney beans, and the recipe asks for a lot of them. So I bought some kidney beans and soaked them overnight. Then I cooked them forever, and they never seemed to be ready. But eventually I thought they possibly were, and added the rest of the ingredients slowly, as per the instructions. I reduced the rice by half because I could see at that time that I was making blooming loads of the stuff and I didn’t particularly want loads of the stuff. It was a bit smelly – kidney beans, bacon, coconut milk and rice has a really rather strong smell, which carries on going, because you have to cook it for so long.

I’ll be frank – Belizeans might like it, but I didn’t and my bowels didn’t, and having learnt after making this meal that kidney beans are potentially toxic if not cooked properly and eaten in too great a quantity, there might be a good reason for that. I’m not being over-dramatic, I know I didn’t actually poison myself this time, but it certainly wasn’t my favourite dish. Dawn liked it (of course, she eats almost anything), but I noticed she wasn’t the one who ate it for several days to come to get rid of the stuff. I picked out all the kidney beans and it was much nicer, but there was still tons of the stuff left after several days and I’d got to the stage of never wanting to see a kidney bean in my life again. I’m ashamed to say it went in the bin: we couldn’t give it to the worms in our wormery because of the bacon in it, and you’re not meant to give meat to the worms. I’ve still got half a packet of dry kidney beans in the larder if anyone wants them.

Belizean meal

Belizean meal

Stew chicken was much more successful. My version looks absolutely nothing like the rest of the pictures of this meal online, I’m not sure why. It’s perhaps because the recipes I found required Recado and I don’t even know what that is, let alone have any. But this one recipe suggested I add a big pinch of paprika instead of it and to add colour. I suspect I didn’t add a big pinch of paprika, only a small one, as Dawn can’t manage really spicy stuff, and so the redness didn’t permeate through. Mine looked so different, that when I came to write the blog (admittedly 2 months later) I couldn’t find the webpage I used to cook it. I spent an hour at least searching the internet for this recipe, and didn’t recognise my meal in any of the webpages. I eventually analysed my photo and typed some of the ingredients into Google, and eventually found the page. Ah whoops.

It might have looked different, well, it definitely looked different, but I expect it tasted different too. It can hardly taste the same when it looks so different. Never mind. It did taste nice, and at the bottom of the page when it suggested a few variations the chef might want to consider, I added quite a few of the recommended variations and although I wasn’t intending to, seem to have made it my own. It was a genuine relief from rice and beans though, so thank heavens for personal innovation.

Rice and Beans

Ingredients

Rice and beans

Rice and beans

1/2 lb red kidney beans 2

2 garlic cloves, crushed

1 tsp salt

1 cup coconut milk

½ tsp black pepper

½ tsp thyme

1 lb rice

1 medium onion, sliced

6-8 cups of water

bacon, chopped

Method

  1. Wash the beans and soak overnight with the water. No wait, I highly recommend you buy tinned kidneys and skip the soaking and the boiling.
  2. Boil the beans until tender, adding the garlic, onion and pieces of bacon pieces.
  3. Add black pepper, thyme and salt.
  4. Add the coconut milk, give it a stir and then let it boil.
  5. Add rice to the coconutty bacon beans. Stir, then cover.
  6. Cook on a low heat until the water is absorbed and the rice is tender.
  7. Here’s something I didn’t know: to warm up leftover rice (and beans), you can sprinkle it with water to re-moisten it before you pop it in the microwave.

Stew Chicken

Stew chicken

Stew chicken

Ingredients

400g chicken breast cut into pieces

some flour

1 clove garlic

1 onion chopped

1 tsp salt and 1 tsp pepper

1 tsp whole cumin

Pinch of thyme

Pinch of paprika

Vinegar or lemon juice

Red pepper

1 tomato

Coriander

1 bay leaf

Oregano

Worcestershire sauce

Basil

Method

  1. Wash chicken and rub in the vinegar or lemon juice. Add salt and put aside.
  2. Heat the oil in a large frying pan and sprinkle in some flour.
  3. Stir it until the flour dissolves, and add the chicken pieces.
  4. Brown the chicken.
  5. Add the onion and garlic, stirring until the onion softens. Don’t burn it!
  6. Add the rest of the spices and stir.
  7. Add water until the chicken is almost covered.
  8. Add the red pepper and tomato
  9. Reduce the heat and cook for about 45 – 60 minutes
  10. Stir every so often and add water if you need to.


Serve the two dishes together. Don’t eat too many kidney beans.

Posted in Belize, International dishes, International recipes, Uncategorized | Tagged , , , | 1 Comment

Dish Thirty-Four: Ukraine

Dawn was quite keen on me making Chicken Kiev for Ukraine – after all, it’s named after the capital city of Ukraine, so it’s the obvious choice to cook. But I didn’t want to do the obvious – how things have changed. It wasn’t long ago when I was looking for the easiest options. Not that chicken Kiev is the easy option, it’s just the obvious one. So instead of immediately going for chicken Kiev, I searched the internet high and low, and found a very tasty looking pudding – vareniki with cherries. It’s a little bit like some of the other recipes I have seen whilst surfing the net looking for recipes from other former Soviet Union, a sort of dumpling with fruit inside. Dawn was massively keen – we do like making pudding (ask her what her favourite of the 80 dishes has been and the first couple are New Zealand (pavlova) and Sweden (chocolate cake) – we like pudding!) and so we really wanted to do this vareniki. The decision was made.

The capital city of Ukraine is Kiev. It used to be part of the Soviet Union, until 1991 when it gained its independence. It is the largest whole country in Europe and the 46th biggest country in the world. There is a girl in Dawn’s year from the Ukraine. She has incredibly long hair. I can only presume she sleeps in her plait because it must take ages to sort it out of a morning. And just imagine the yelps of “ow that really hurts Mummy” as the knots get brushed out – I get enough of them with Dawn’s hair.

Map of Ukraine

Map of Ukraine

Back to the vareniki. After swimming, we went to Tesco to buy the cherries, but we couldn’t find any. So we went to the Co-Op, but they didn’t have any. So we went to a greengrocer, but they didn’t have any. So we went to Sainsbury’s but they didn’t have any. It seems that cherries aren’t in season in April. Vareniki was sadly shelved at this point. You can hardly have vareniki with cherries without the cherries now, can you? Back to the drawing board, and inevitably, back to chicken Kiev.

There are a number of authentic chicken Kiev recipes online. I found several that required the chicken to still be on the bone, and the bone sticks out the end of the chicken like a rather unappetising chicken lollipop. Didn’t fancy that. Instead I used this recipe from Natasha’s Kitchen.

An important part of the recipe for chicken Kiev is the garlic butter. I’ve always presumed that the green bits in the garlic butter is the garlic bit of the butter, but it isn’t. The green bits are actually bits of parsley. Dawn enjoyed making the garlic butter, mainly because you have to mould it into a long garlic butter poo before putting it in the freezer till you’re ready for it.

She also enjoyed flattening the chicken pieces. I had tried to buy a kitchen mallet, but of course, Tesco had run out of them as well as cherries. So I used the wooden rolling pin again. Dawn may have enjoyed banging the chicken with the rolling pin, but she wasn’t altogether successful. She kept missing, and the rolling pin now has a couple more dents in it than it used to where it hit the edge of the marble chopping board. Anyway, we did manage it, and wrapped our garlic butter poo in the chicken.

You may remember that for dish 3 we went to Austria and made Wiener Schnitzel. What a twit I was back in those days, making the bread crumbs to cover the schnitzel with home-made breadcrumbs from burnt toast. But Sven told me in the comments that you can buy breadcrumbs from the shop. I didn’t know that. As I now do, I bought a tub of breadcrumbs and used them. Wow! It was so much easier! Sven also told me to use different oil for each one I made – I think I changed it a couple of times. Thanks for the tips, Sven. They were much more of a success that the Wiener Schnitzels.

The other thing that made them more successful was that they were cooked. I recall that the Wiener Schnitzels were only part cooked and I had to cook them a bit longer after we had served up, cut into it and it oinked at us. The chicken Kiev was fried in the pan and then baked in the oven. And it was cooked.

The most exciting bit of news about the chicken Kievs for me was that although only Dawn and I ate the Kievs, I made an ungarliced breaded chicken bit for Neil, and more importantly I chopped up a chicken breast and made Daniel chicken nuggets. He loved them. He scoffed the lot – that’s a whole chicken breast, and more than he usually eats. The next day when I served him up the usual Bird’s Eye nuggets, he asked if I had made them myself and was really disappointed to hear that I hadn’t. Bless him. He knows the way to his mother’s heart, doesn’t he.

Oil burns

Oil burns

The most unsuccessful part of this dish was the slight oil-related accident I had. There I was, heating up my oil, and I plopped the first Kiev in the oil. Unfortunately, I didn’t turn the oven down first, and the oil was rather excited. It splurged all over me. In particular all over my favourite Mads jumper from university (that’s now ruined, I’m going to have to steal Neil’s now – shh don’t tell him). Oh, and also it spat all over my wrist. It burnt me relatively badly. It’s now 6-8 weeks later, and I still have the scars. It hurt quite a lot, but it didn’t blister, and the skin only broke because I gave it a good scratch once unconsciously. I expect the scars will be just one more way I can remember my 80 dishes adventure for the rest of my life. An A&E trip and permanent scars – not bad for less than half of the challenge, I suppose. Or maybe not. Ah well.

Anyway, the chicken Kiev was good. Only one of them fell apart, all of them leaked garlic butter, but they were really juicy and tender, and if it weren’t for the burns and the ruined clothes, it would have been perfect. The photo doesn’t do it justice, because it’s a Dawn-sized meal and looks a little sparse. But it was tasty.

Chicken Kiev

Ingredients

Chicken Kiev

Chicken Kiev

4 chicken breasts
2 eggs, beaten
3/4 cup plain flour
1 1/2 cups golden bread crumbs
Salt and pepper

8 tbsp butter, at room temperature
1 garlic clove, minced
1 tbsp lemon juice
2 tbs chopped fresh parsley
1/2 tsp salt
1/2 tsp pepper

Method

1. Mash together the 8 tbsp softened butter with the garlic, lemon juice, parsley salt and pepper.

2. Shape the butter mash into a 3/4 inch thick log (see, I said it looked like a big poo).

3. Cover with cling film and put it in the freezer while preparing the chicken.

4. Pat dry the chicken breasts with kitchen towel. Pound the chicken with a rolling pin until they’re about 1/8 inch thick, with the edges thinner than the middle. Put the chicken between 2 sheets of wax paper when pounding – I put it between 2 bits of clingfilm, but the cling film split.

5. Sprinkle one side of the chicken with salt and pepper.

6. Remove the butter mash from the freezer and cut into quarters. Place a piece of butter in the middle of each of the chicken breasts.

7. Fold two opposite sides down over the butter. Fold in the other end of the chicken breast and roll up the rest. Make sure there are no gaps in the chicken or the garlic will ooze out.

8.Heat 1 inch of oil in a frying pan. There needs to be enough oil to cover the chicken at least half-way.

9. Prepare 3 separate dishes: 1 with the flour in it, one with the beaten eggs and one with the bread crumbs.

10. Cover the chicken piece in the flour.

11. Dip the chicken piece in the egg, covering it.

12. Cover the chicken with bread crumbs.

13. Turn the oil down a bit. Place the chicken in the pan carefully and fry until it is golden brown, then turn it over and do the same then as well.

14. Remove chicken and put it on a baking tray. Repeat it with each piece of chicken.

15. Bake all the pieces for 18-20 minutes in the oven at 180C.

16. Drain the pieces on paper towels for 10 minutes before serving.

Posted in chicken Kiev, International dishes, International recipes, Ukraine | Tagged , , | Leave a comment

Dish Thirty-Three: Spain

Lego minifigure birthday cake

This dish nearly didn’t happen. Well, dish 33 would have done, but not that week, maybe a week or so later, and it probably wouldn’t have been Spain. As it was, the two weeks after I did this one I was unable to do any 80 dishes as we were on holiday, and then it was Daniel’s 6th birthday party. Lots and lots of baking involved, but not 80 dishes. Lego minifigure birthday cake, lego biscuits, lego candy, lego pizza, lego head marshmallows, lego minifigure crayons. Definitely no 80 dishes that week, in fact we had a takeaway. Two weeks without 80 dishes was quite a break, but I think 3 weeks would have almost seen the end of the project, getting out of the swing of things. It almost did anyway.

Lego Candy Cupcakes

But because I’m like a dog with a bone, I did manage it. I chose Spain in an unorthodox way – as we sat in the creche at church preparing it for the morning ahead, I thought about the busy day ahead – cleaning the house and doing the washing up, and of course, packing for a week’s holiday in Scotland starting on Monday. I decided I might be able to fit in an 80 dish if, and only if, it was easy and I already had all the ingredients. I pondered what might be an easy country, and decided Spain probably would be. So I searched on the internet looking for Spanish recipes that I had all the ingredients for and found what I was looking for. Pollo al Chilindron. All the ingredients already in the larder and relatively easy to make, even for my stunted abilities.

Map of Spain

Map of Spain

Spain is, as I’m sure you know, in Europe. The capital city is Madrid and they speak Spanish. I give this information about each country, but it somewhat feels daft telling you about Spain in this way. Well, maybe some of my readers are very well acquainted with Paraguay or wherever, and they felt like I was treating them like a big thickie by telling them about Paraguay. So I have to stick with the formula. I don’t speak Spanish. At my school it was compulsory to learn French to GCSE (except for the girls who were learning English as a foreign language), and if we wanted to we could choose either German or Spanish. I chose German. Spanish is much more closely related to French than German is, and to be frank maybe I would have made the better choice choosing Spain – I really wasn’t very good at German, although I took both French and German to A-Level. I decided a good few years after school that I was going to learn Spanish next after I’d learnt Welsh. Got books and everything, but I never started. Dawn decided to learn German in October, and is teaching herself – she wrote her first letter, two pages, in German today. She puts me to shame.

Back to Pollo al Chilindron. Pollo means chicken, and Chilindron is the type of sauce the pollo sits in. It’s basically chicken stew. The new technique I learnt in making this dish was blanching tomatoes. You may remember from Egypt (when I think it was almonds I had to blanche) that blanching means to take off the skin. For this recipe, you need to have skinless tomatoes. The best way to take the skins off a tomato is apparently to shallowly cut the tomato skin (I cut it into quarters) and then place the tomatoes into a bowl of boiling water. After not very long, the skin just easily peels off. Da na! Skinless tomatoes. They feel gross. I hate warm tomatoes.

This recipe really was easy, just as I had hoped, which was just as well in the circumstances. And it looked so tasty. Have a look at the picture – it really did! It’s not often that the picture looks appetising, let’s face it, but this one does. What’s more, it tasted good as well. I fortunately, as usual, made too much and had some left over. I usually eat it the next evening, but we went to Scotland the next day, so I froze it and ate it the week after we got back. It really was good and Dawn enjoyed it too. I will definitely make this one again. It turns out I’m saying that a lot doesn’t it. Well, that was one of my personal intentions for this project – not only to cook 80 dishes from around the world, but also to learn to cook and to get some recipes to fall back on instead of jars of jollop.

Pollo al Chilindron

Pollo al Chilindron in the pan

Pollo al Childindron in the pan

Ingredients

600 grams of chicken

Flour

Olive Oil

4-5 garlic cloves, chopped

1 large onion, chopped

1 red pepper, chopped

1 green pepper, chopped

4 blanched tomatoes, chopped

Pollo al Chilindron

Pollo al Childron

1 large glass of dry white wine

Water

Salt

Pepper


Method

  1. Chop the chicken into large pieces.
  2. Wash the pieces and pat them dry with kitchen towel.
  3. Put salt and pepper on them and cover each piece with flour.
  4. Heat the oil in a pan, add the pieces of chicken and fry until it’s goldenish.
  5. Add the garlic, give it a stir and then add the onion.
  6. Cook for a couple of minutes, add the peppers and stir.
  7. Cook for 5 minutes and add the tomatoes.
  8. Mix it all up and add the wine. When it starts to boil, turn the heat down and leave it to simmer.
  9. Add about half a glass of water when it begins to thicken.
  10. Cover the dish up and cook for a further 30 minutes.
  11. Serve. We had ours with pasta.
Posted in International dishes, International recipes, Spain, Uncategorized | Tagged , , , | Leave a comment

Dish Thirty-Two: Malta

The recipe for Malta was one of the very first that was decided upon. I was told by Dawn and Grandma that without a doubt Malta would need to be done at Easter, as it was Maltese Easter biscuits. So come Easter, we didn’t choose the dish in the usual way by picking a random number and seeing what country it corresponded to – the choice was already made. So I looked up Maltese Easter biscuits online and here at Gourmet Worrier and discovered that actually they are called Figolli. Figolli are very traditional and are made in Malta every year by the whole family. There are websites dedicated to them, so many pictures of people’s amazing creations and a Facebook fan page, which turned out to be quite useful.

Map of Malta

Map of Malta

Malta is a small island just south of Sicily. The capital city is Valetta, the smallest capital in the EU. Its official languages are English and Maltese. The apostle Paul was shipwrecked on Malta. It is a Catholic country.

Figolli are basically biscuits (the name Maltese Easter biscuits might have given that away!), but they are two biscuits sandwiched together with home-made marzipan in the middle. The marzipan doesn’t taste like marzipan though, one of the reasons being that it’s got a capful of orange blossom water in it. Orange blossom water doesn’t taste like orange; it tastes like flowers, which came as a surprise to me. I bought my bottle from the Mediterranean shop on Elm Grove in Portsmouth. There’s probably a similar sort of shop near enough to you though – you don’t need to travel to Portsmouth to buy some.

Once the figolli are made, decorating is very important. There are some massively elaborately and beautifully decorated figolli out there, so I had a lot to live up to. There was no way I was going to manage it. The biscuits are meant to be large, bold shapes, the most traditional shapes being men and women, or fish and baskets, but are now also frequently rabbits, butterflies, ducks, cars etc.

They are meant to be iced with royal icing, piped round the edge, with a chocolate egg on the top, and are amazing. But they’re also meant to be a family affair. So come Good Friday we made the biscuits. You have to remember to make the shapes in multiples of two, because they are sandwiches. Dawn and Daniel chose the shapes, Dawn and I cut them out and I put the filling in and sealed the top biscuit to the bottom biscuit. We had circles, rectangles, squares, pentagons, bunnies, lorries and dinosaurs.

We ran out of time on Good Friday and so spent the afternoon on Easter Saturday decorating them. Again, it was mostly Dawn and I, but Daniel also joined in especially putting the eggs on top, which has to be done before the icing hardens or it’ll fall off. And of course, because the children helped to decorate them, it gave me an excuse for them to not look like all the perfect amazing ones that I found online. Truth to tell though, I decorated most of them. We made about 35 of the things and they were really tasty. As they were quite big, they were quite hard work to eat sometimes, but mainly lovely.

But look, as usual, the recipe forgot to stipulate how many I was making, and it certainly didn’t take into account that I had no idea how much filling I was meant to put in the biscuits. As it happens, I suspect the answer was – considerably more than I did. I say that because there was so much filling left over when I was done. I had made an awful lot of the stuff, so much that I had to use my biggest mixing bowl  – after all, I used 600g of ground almond alone. And what was I meant to do with all that leftover mixture. taking chunks off and eating it was amazing, but I could hardly advocate that: it had raw egg in it. Both the kids tried it though, even Daniel, and Dawn in particular was rather taken by it. So I went to the figolli Facebook page, and asked what I should do with it. And the answer was simple but exquisite. Pastini. Make the leftovers into small balls and bake them for a bit. The ball making was incredibly messy, leaving a thick skin of mixture on my hand which I had to scrape off every so often. But the result was amazing. Small balls of this baked mixture, with hard shells and a moist centre. I took some to work the next day and couldn’t manage to eat them all without sharing one so that others could also experience their amazingness. They are very similar to macaroons, but tiny bite-size  versions. Ahh, my mouth is watering just at the memory of them. You could only eat one or two at a time though, because although they were small, they were incredibly sweet.

My conclusion then is that figolli is certainly an Easter tradition that we want to recreate. But the best discovery was pastini.

Figolli

Iced figolli

Iced figolli

Ingredients

Pastry

350g caster sugar

800g sifted plain flour

400g butter

Rind of 1 lemon, grated

4 egg yolks, beaten

Almond filling

Almond filling leftovers

Almond filling leftovers

600g icing sugar

2-3 egg whites

Rind of 1 lemon, grated

Orange flower water, 2 capfuls

600g ground almond

Icing

Icing sugar

Water

Small Easter eggs


Method

  1. Mix the caster sugar with the flour.
  2. Rub in the butter to make fine crumbs.
  3. Add the grated lemon rind and the egg yolks, plus a little bit of water.
  4. Knead it all together to make a dough ball.
  5. Wrap the dough in cling film and put it in the fridge for 20 minutes.
  6. Mix the lemon zest, orange blossom water and sugar with the ground almonds.
  7. Add the egg whites and mix until it’s well mixed.
  8. On a floured surface, roll out the pastry and cut out the shapes. Make sure you make a multiple of two of each shape, so that you can make a sandwich.
  9. Put the first shape on a greased baking tray.
  10. Spread a generous amount of filling onto the shape, leaving a small margin at the edge of the shape.
  11. Lay the second shape on top of the first one.
  12. Seal the edges together – this is best done by wetting the edges.
  13. Bake in the oven at 200C for 5 minutes.
  14. Bake for a further 20 minutes at 180C, until they are beginning to go golden.
  15. Once cold, cover each biscuit with icing, decorating them however you like.
  16. While the icing is still soft, press a small Easter Egg in the middle of each shape.


Pastini

Ingredients

Pastini

Iced figolli

Left over almond filling

Method

  1. Roll the filling into small balls.
  2. Place on baking tray.
  3. Bake in oven for 20 minutes.


Posted in International dishes, International recipes, Malta | Tagged , , , , | 2 Comments

Dish Thirty-One: Paraguay

Paraguay represents our first dip into South America in this project. As you know, Dawn chose 78 countries at the beginning (the first and the last are England, you recall, to be true to the book), and I’ll admit to you now that they are not evenly spaced. We’re nearing the middle of the journey now, but unless you can see the map of the world covering the whole of the wall in the spare room, with little blobs (sometimes very little) of blutac on each chosen country, slowly being taken away, you won’t appreciate that actually it’s rather Europe-centric. There’s quite a lot of Europe. In fact, I don’t think I ever told you this, but after the 80 dishes were chosen, we went through them, and crossed a load out and tried to spread them slightly better over the continents. Treeland no longer has a look in. South Sandwich Island does! So there are other South American countries, but not many. And of course South America is the continent with the least amount of countries in it, so it’s going to be less represented anyway I guess.

By the way, I’ve just reviewed my first ever blog post, before I even started cooking, the introduction as it were. One of the last lines in it is an assertion that I will tell you all about every dish I make hopefully on the evening of the day that I make it. Oh, how I laughed as I read that. Let’s face it, I’m a bit behind with the old blog writing. I made Paraguay about 6 weeks ago, on 20th March, and I’ve made 4 more since then. It’s about time I caught up really! It reminds me of when I was a teenager writing my diary – all it needed was 5 lines a day at bedtime, but I would always find myself writing about what happened two weeks previously and trying to catch. It made for a God-awful diary, boring as hell, although some of it would probably still be amusing if I read it now. And of course, it’s why I’m blethering now, because 6 weeks is a long time, and I can’t really remember all that much. Oops. Note to self: get on with it, write closer to the cooking and wake up.

Map of Paraguay

Map of Paraguay

Paraguay is in central South America. It is one of only 2 landlocked countries on the continent, the other being its neighbour, Bolivia. The capital city is Asuncion. When researching for this dish, I learnt that there are two main languages in Paraguay: Spanish and Guarani. Guarani, I’m sure you can work out, is one of the original ones before us pesky Europeans came and invaded. I can’t help by notice the “gua” bit in both the name of the country and the language. “Guay” means “born”, whilst “para” means water. Well, well, you learn something new every day, or as they say these days, every day’s a school day.

So what have I learnt about Paraguayan cooking. Well, not a great deal that has stuck in my long-term memory. Maybe I have more of a short-term fact-retaining memory. But long enough to remember sufficient facts to pass a load of exams, get two degrees and a certain amount of legal qualifications (I’m not actually a chef by day!! I know – who’d’ve thought it!) What I noticed most about Paraguayan cooking was that it involves a lot of cheese. Quesú Paraguái is traditional Paraguayan cheese, and they like it a lot. I don’t. I don’t like cheese, Neil throws up at the taste of cheese and feels nauseous at the smell of it cooking, Dawn ain’t keen on the stuff, and Daniel, well it isn’t dinosaurs or chips is it. So a lot of Paraguayan cooking seemed to be off the menu.

They’re quite into breads as well, breads made with cheese, like chipa, which also requires cassava, and I’m not sure how readily available that is in the south of England. Sopa Paraguaya is a popular traditional dish, which as you might guess means Paraguayan soup. But it’s a bit of a misnomer, because actually it’s more of a cornbread, and eaten like slices of cake. I liked the idea of a breakfast dish – we’ve not had any of them yet, and a couple of websites I found had quite a few suggestions. I wanted to make Mandi’o Chyryry for two reasons, 1) because the pictures looked tasty; 2) It’s pronounced mandio shoo-doo-doo which in no way is represented by the letters in its name. But I don’t speak Spanish, and the only recipes I could find in English were hidden behind broken links. Oh and it needed yuca root, again something not supplied in bounty in southern England.

So'o Yo-Sopy and sweet potato

So’o Yo-Sopy and sweet potato

Finally then, I chose So’o Yo-Sopy, otherwise known as beef soup. I used a combination of two websites:  Where Latin Meets Lagniappe (another blog site, which I don’t like doing really, but from my research I knew it was authentic) and  anngell.tripod.com  which has a more authentic feel to the page. So’o Yo-Sopy was very tasty. It asked for cheese, but I left the cheese out. I made the executive decision that it would be just as authentic without it, especially as anngell says it’s only required for sprinkling on top.

The dish requires ground beef, so I bought some beef mince and put it in my trusty Annabel Karmel hand blender, that I got when Dawn was a baby and I was determined (for a few months at least) to make all my own food for her. Too much of a pain in the backside, I resorted to jars of baby food after not too long. Anyway, I have a hand blender, and I used it to make ground beef. I used it later in the recipe as well – once the meat has cooked it rather clumps together, and so I got as much of it as I could, out of the big pot of soup I’d made, blended it all over again, and then plopped it back into the pot. Plop being the operative word – it did splash a bit.

So’o Yo-Sopy is soup, but it seems rather stewy. It has all sorts in it, but I think it is the rice that gives it that filling feeling. Anngell says that “superstition has it that if anyone does not enjoy cooking is present in the kitchen they may cause the So’o Yo-Sopy to separate and spoil the dish”. Well apparently I like cooking, because ours was fine. We ate it with a baked sweet potato, as per the recommendation. But I didn’t really bake them long enough, and Dawn didn’t eat all of hers. The soup was a hit though, and because I had, as usual, made enough for a small army, I ate it for lunch for the rest of the week. I kept forgetting to take a spoon, so had to eat it with a teaspoon and slurp the dregs out of my Tupperware tub . It was a lovely change. A meal I would repeat, but either without the sweet potato and just bread instead, or learn how to bake a sweet potato better!


So’o Yo-Sopy

So'o Yo-Sopy

So’o Yo-Sopy and sweet potato

Ingredients

Beef mince

2 tablespoons vegetable oil

2 medium onions, diced

1 green pepper (couldn’t find any in the shops, so I used red pepper instead), finely chopped

4 tomatoes, peeled and chopped. To peel a tomato, it’s best, it turns out, to blanche them. Put some cuts round the skin, quartering or halving the tomato, put them in a pan of hot water for a few minutes, and then the skin comes off easy.

1/2 cup rice

Salt

2 cloves of minced garlic

Method

  1. Put the ground beef in a large pot and add 10 cups of water. That’s an awful lot (remember to think that, by the way. I did, and I was right).
  2. Add the rice and the minced garlic and heat on a medium heat.
  3. Cook for at least 30 minutes. Stir every now and then. Try to break apart the larger pieces of meat, be that by the method I described above, or with a wooden spoon.
  4. In a different frying pan, heat the oil and fry the onions and pepper until the onions are softened.
  5. Add the tomatoes and cook until the mixture is thicker, which is about 5 minutes.
  6. Blend your meat to get it unstuck from each other.
  7. Stir in the onions, pepper, tomato and some salt and mix well. Don’t add the salt earlier than this or the whole thing might separate apparently.
  8. Eat the soup.
Posted in International dishes, International recipes, Paraguay, Uncategorized | Tagged , , | Leave a comment